-

This is an attempt to prototype a mobile game idea that uses magnetic forces and fluid simulation inspired by ferrofluids.
I chose Unreal Engine 5 for the task. After setting up the project repo using Perforce and preparing the build pipeline for iOS, I was ready to make the prototype.
I started with the magnetic field, the idea here is when you click on an astroid, it becomes magnetic and attracts the particles. It’s not the best gameplay mechanic I know, but it was a good enough start to test the magnetic forces.
Prototyping ferromagnetic forces Upon my initial investigation, I realized that although UE5 has a powerful fluid simulation system, it doesn’t work in macOS or iOS. Honestly, I didn’t expect it either, as I’m already surprised that UE5 runs smoothly on M-series MacBooks!
I stumbled upon this brilliant post while searching for another solution. The idea is to keep the number of particles limited (64, for example) and use a rendering technique called ray marching to smooth these particles together into a fluid-like substance. These smoothed spheres are also called metaballs.
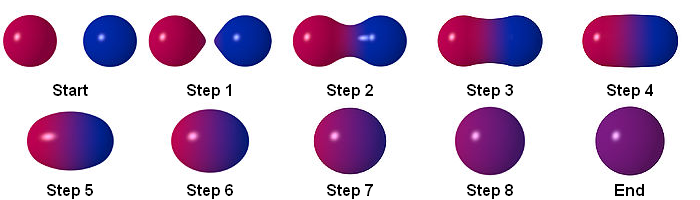
This is how different levels of smoothness affects metaballs As far as I know, Unreal Engine doesn’t support metaballs or even ray marching by default. In the post mentioned above, the author uses a plugin, but it is outdated now. I tried finding other add-ons but didn’t find anything good. Therefore, I decided to create it from scratch. This way, I had more control over the results and the opportunity to learn ray marching along the way.
However, this decision meant that I had to write some HLSL in UE5. I’ve had prior experience writing HLSL code in Unity, and while Unity supports HLSL really well, it’s not the same in Unreal Engine; You can write custom HLSL code, using a Custom node in material editor, but it’s really user-unfreindly (or unuser-friendly?) and you can’t even reference a file and have to use a plain text field to write your code. I was searching for resources on that and found this epic (pun intended) live training session.
This was a great beginning as it helped me create a metaball shader. However, I wanted to share the location of the spheres at runtime without having to create a hundred nodes (to be exact, 128 for 64 spheres) in material editor, then reference them in C++. The real nightmare was changing the number of spheres. Imaging redoing all of that again.
That’s why I used render targets to feed the spheres’ location to the custom node, which loops over the pixels and sets the spheres’ location and radius based on their RGBA value.
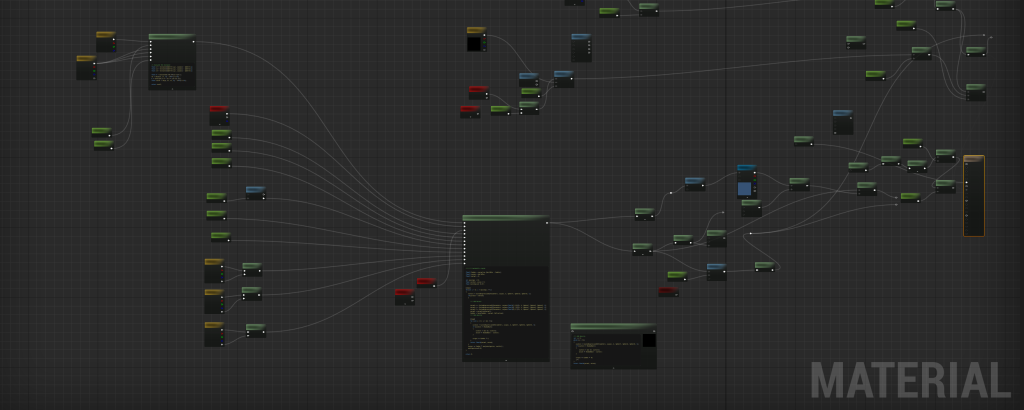
Transferring run-time data to the custom shader using render targets. This is the first try, and the code is not optimized. The final material is something like this, fairly more optimized and cleaner – dear Epic, please improve the code editor in material graphs!)
At this point, All the particles were
Actors, and I used theUStaticMeshComponentclass for particles and theirAddImpulse()method to move them around. This approach was good enough to test things out but not efficient, especially considering that I didn’t need most of theUStaticMeshComponentfeatures. I thought of usingUSphereComponent, but even then, I was using CPU threads to process something suited for the GPU.That’s why I considered the Niagara System (not Niagara Fluid System). It made sense because I wanted to utilize the GPU while incorporating physics and collisions, and Niagara System provided all of these features. I just had to connect user input to the particle system and the particle system to the ray marching shader.
Using Niagara System At first, I wanted to calculate the attraction force for each particle, but it was too slow. While I had a lot of “fun” trying to create a Niagara Data Interface, I did not use it and just sent one vector as the mean magnetic center to the system.
Here, I packaged the prototype for iOS and tried it on my phone. It was really slow! And I wasn’t surprised because ray marching is an expensive technique. I tried lowering the sample count to reduce the lag, but it caused weird visual artifacts. To solve that, I added some noise to the sampling distance, which fixes those problems but adds noise to the final result. To embrace the noise, I added a post-processing effect that adds some noise to everything.
Lowering the sample count caused noise I tweaked the parameters more and removed the “asteroids” to get a better visual result, and here I got. This version runs smoothly on an iPhone 15 but it’s still way far from a production-ready state.
float MetaballSDF(float3 curpos, float4 Sphere1, float4 Sphere2, float4 Sphere3, float k)
{
    float s1 = length(curpos - Sphere1.xyz) - Sphere1.w;
    float s2 = length(curpos - Sphere2.xyz) - Sphere2.w;
    float s3 = length(curpos - Sphere3.xyz) - Sphere3.w;

    float h  = saturate(0.5 + 0.5 * (s2 - s1) / k);
    float m12 = lerp(s2, s1, h) - k * h * (1.0 - h);

    h  = saturate(0.5 + 0.5 * (s3 - m12) / k);
    float m123 = lerp(s3, m12, h) - k * h * (1.0 - h);

    return m123;
}
static const int kMaxStepsPrimary = 32; static const int kMaxStepsShadow = 48; static const float kHitEps = 1e-3; static const float kMinStep = 0.01; static const float kMaxDist = 200.0; static const float kShadowMaxDist = 80.0; static const float kShadowStepScale = 0.9; inline float SDF(float3 p) { return CustomExpression0(Parameters, p, k, Sphere1, Sphere2, Sphere3, t); } inline float3 TetraNormal(float3 p, float eps) { float3 e = float3(eps, eps, eps); float d1 = SDF(p + e.xyy); float d2 = SDF(p + e.yxy); float d3 = SDF(p + e.yyx); float d4 = SDF(p - e.xxx); return normalize(float3(d1 - d4, d2 - d4, d3 - d4)); } float4 MetaballsRay(float3 WorldPos, float3 CamPos, float thresh, float ShadowMult, float o, float Refraction) { float3 rayDir = normalize(WorldPos - CamPos); float3 curPos = WorldPos; float tAccum = 0.0; [loop] for (int i = 0; i < kMaxStepsPrimary; ++i) { float d = SDF(curPos); if (d < thresh) { float3 N = TetraNormal(curPos, o); float3 refrDir = normalize(lerp(rayDir, -N, Refraction)); float accum = 0.0; float shadowT = 0.0; float3 sPos = curPos; [loop] for (int j = 0; j < kMaxStepsShadow; ++j) { if (shadowT > kShadowMaxDist) break; float sd = SDF(sPos); if (sd < ShadowMult) { sd = max(sd, 0.0); accum += (ShadowMult - sd); if (accum >= ShadowMult * 1.5) break; } float stepLen = max(kMinStep, sd) * kShadowStepScale; sPos += refrDir * stepLen; shadowT += stepLen; } return float4(N, accum); } float stepLen = max(kMinStep, d); curPos += rayDir * stepLen; tAccum += stepLen; if (tAccum > kMaxDist) break; } return float4(0,0,0,0); }While it was a great experiment, I parked the idea here to work on more exciting stuff!
-
A Maya recreation of Dan Lowe’s adjustment blending technique in Motion Builder
This tool fine-tunes the blending of additive animation layers in Maya. I recreated Dan Lowe’s adjustment blending technique in Maya’s Python API, a tool that was originally written for Motion Builder.
The challenge was understanding how the tool functions in Motion Builder and then recreating it in Maya. I enjoyed troubleshooting and resolving various bugs along the way. You can find the script here.
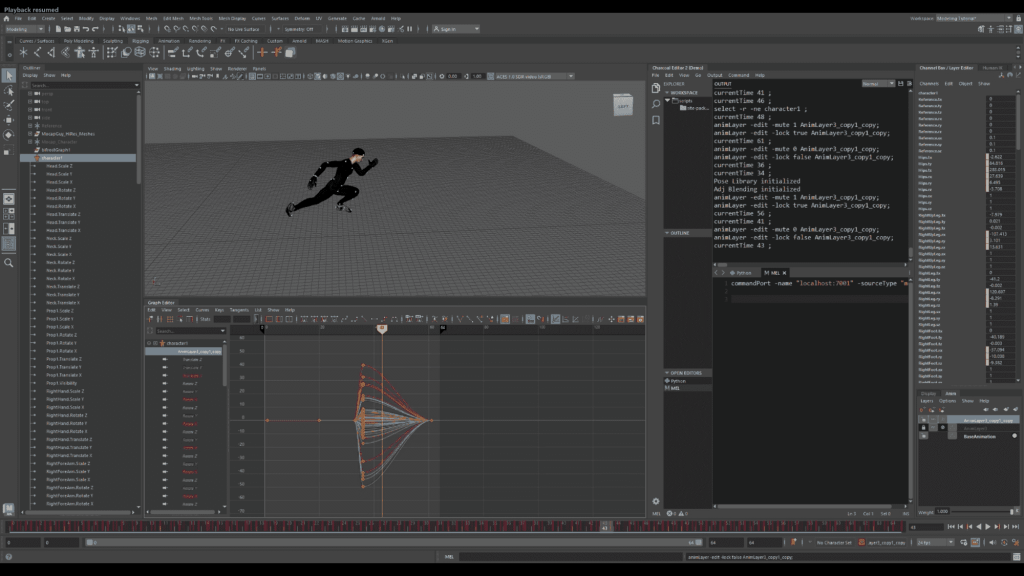
Before adjustment 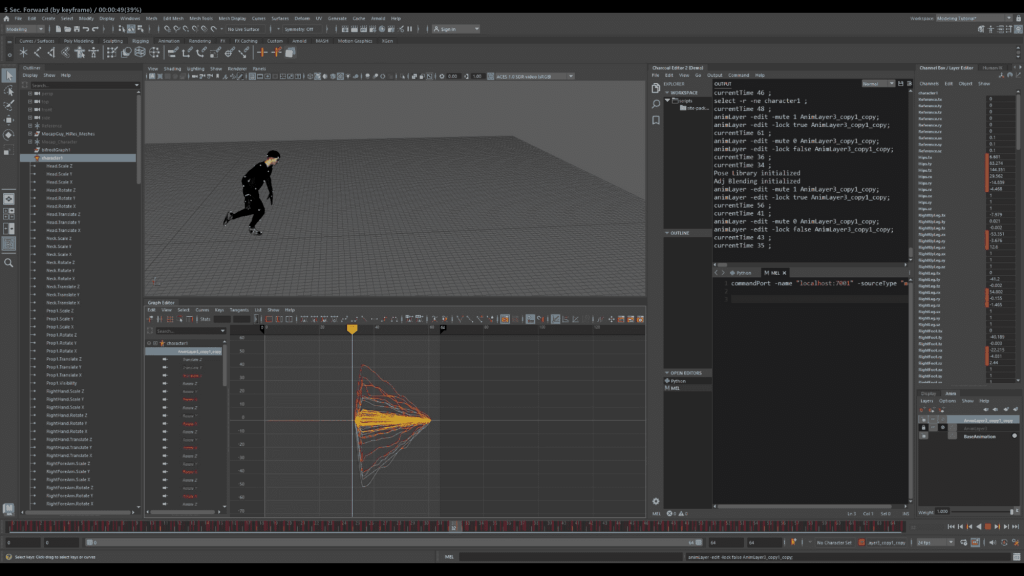
After Adjustment During the development process, I utilized the Studio Library plugin for loading and saving poses on the new animation layer, which inspired me to create a pose library tool for Maya.
-
Real-time Motion Graphics and FX
Check out my personal branding video created in Unreal Engine 5! I utilized blueprints, Niagara, Houdini, 3D Video, and the entire experience runs in real-time. I also dedicated time to fine-tuning post-processing effects for an even more immersive feel. Feel free to watch the video!
Process
-
A tool for saving, loading, and keying poses in Maya
I developed this tool while addressing another challenge! Using Qt widgets, I crafted a user-friendly UI that utilizes a pose library class. The tool is responsive to selections (thanks to script jobs) and offers a range of features:
- Save, Load, and Key Poses: Users can conveniently save, load, and key various poses.
- Smart Indexing for New Poses or Animation Layers: The tool indexes new poses or animation layers based on the existing items’ count.
Feel free to check out the video to witness it in action!
-
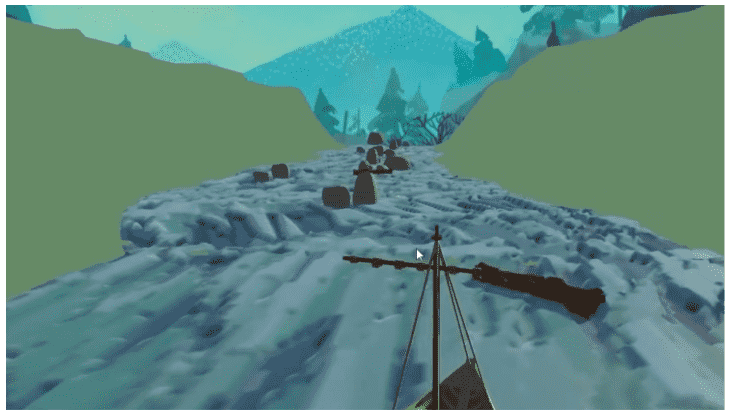
A short game trailer made in SideFX Houdini and Blender
Project
Infinite River Game Prototype
Role
3D motion graphics design, storyboarding, 3D modeling, shading, cinematography.
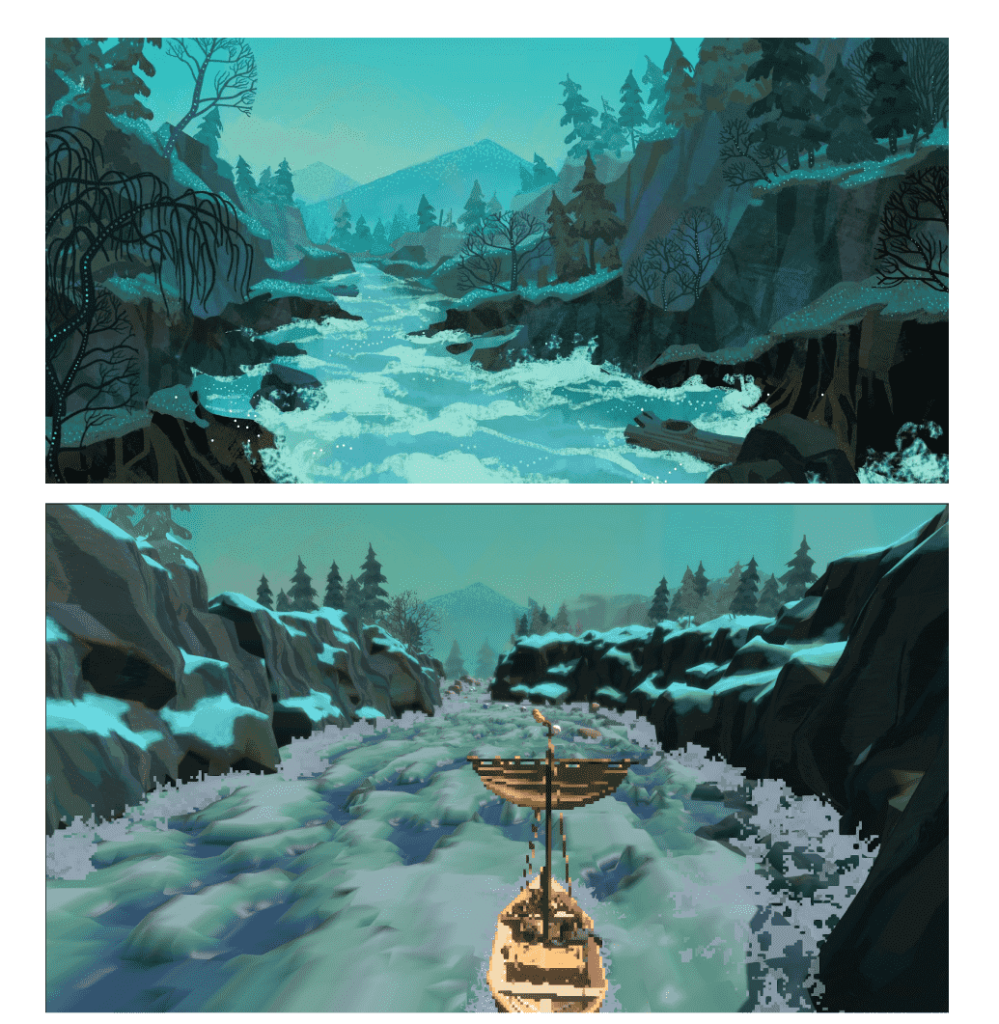
In this part of the project, my main responsibility was creating the motion graphics. The exceptional 2D art was skillfully crafted by my talented teammate, Ziyi Gao, while Tao Qin was responsible for the impressive boat and passengers’ modeling. Working with both of these amazing artists was an absolute pleasure!
Feel free to check out this post to explore my 1-week workflow further.
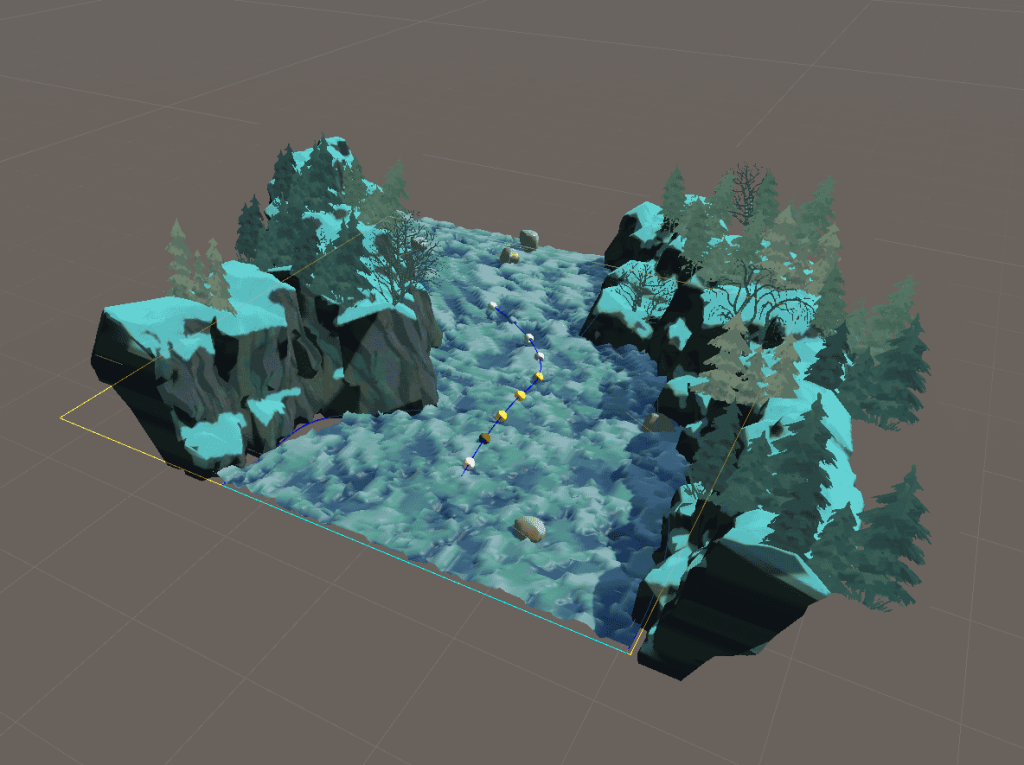
Furthermore, I designed the terrain, representing Canada’s map and the York Factory Express.
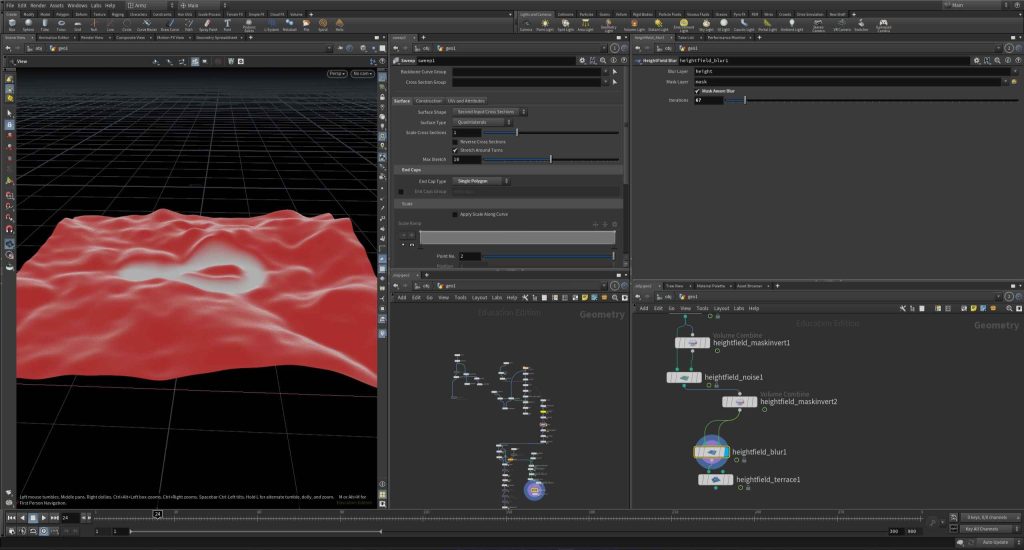
I created the terrain in Houdini, representing the York Factory Express’s path across Canada. I invite you to watch the video for more detailed information about the concept!
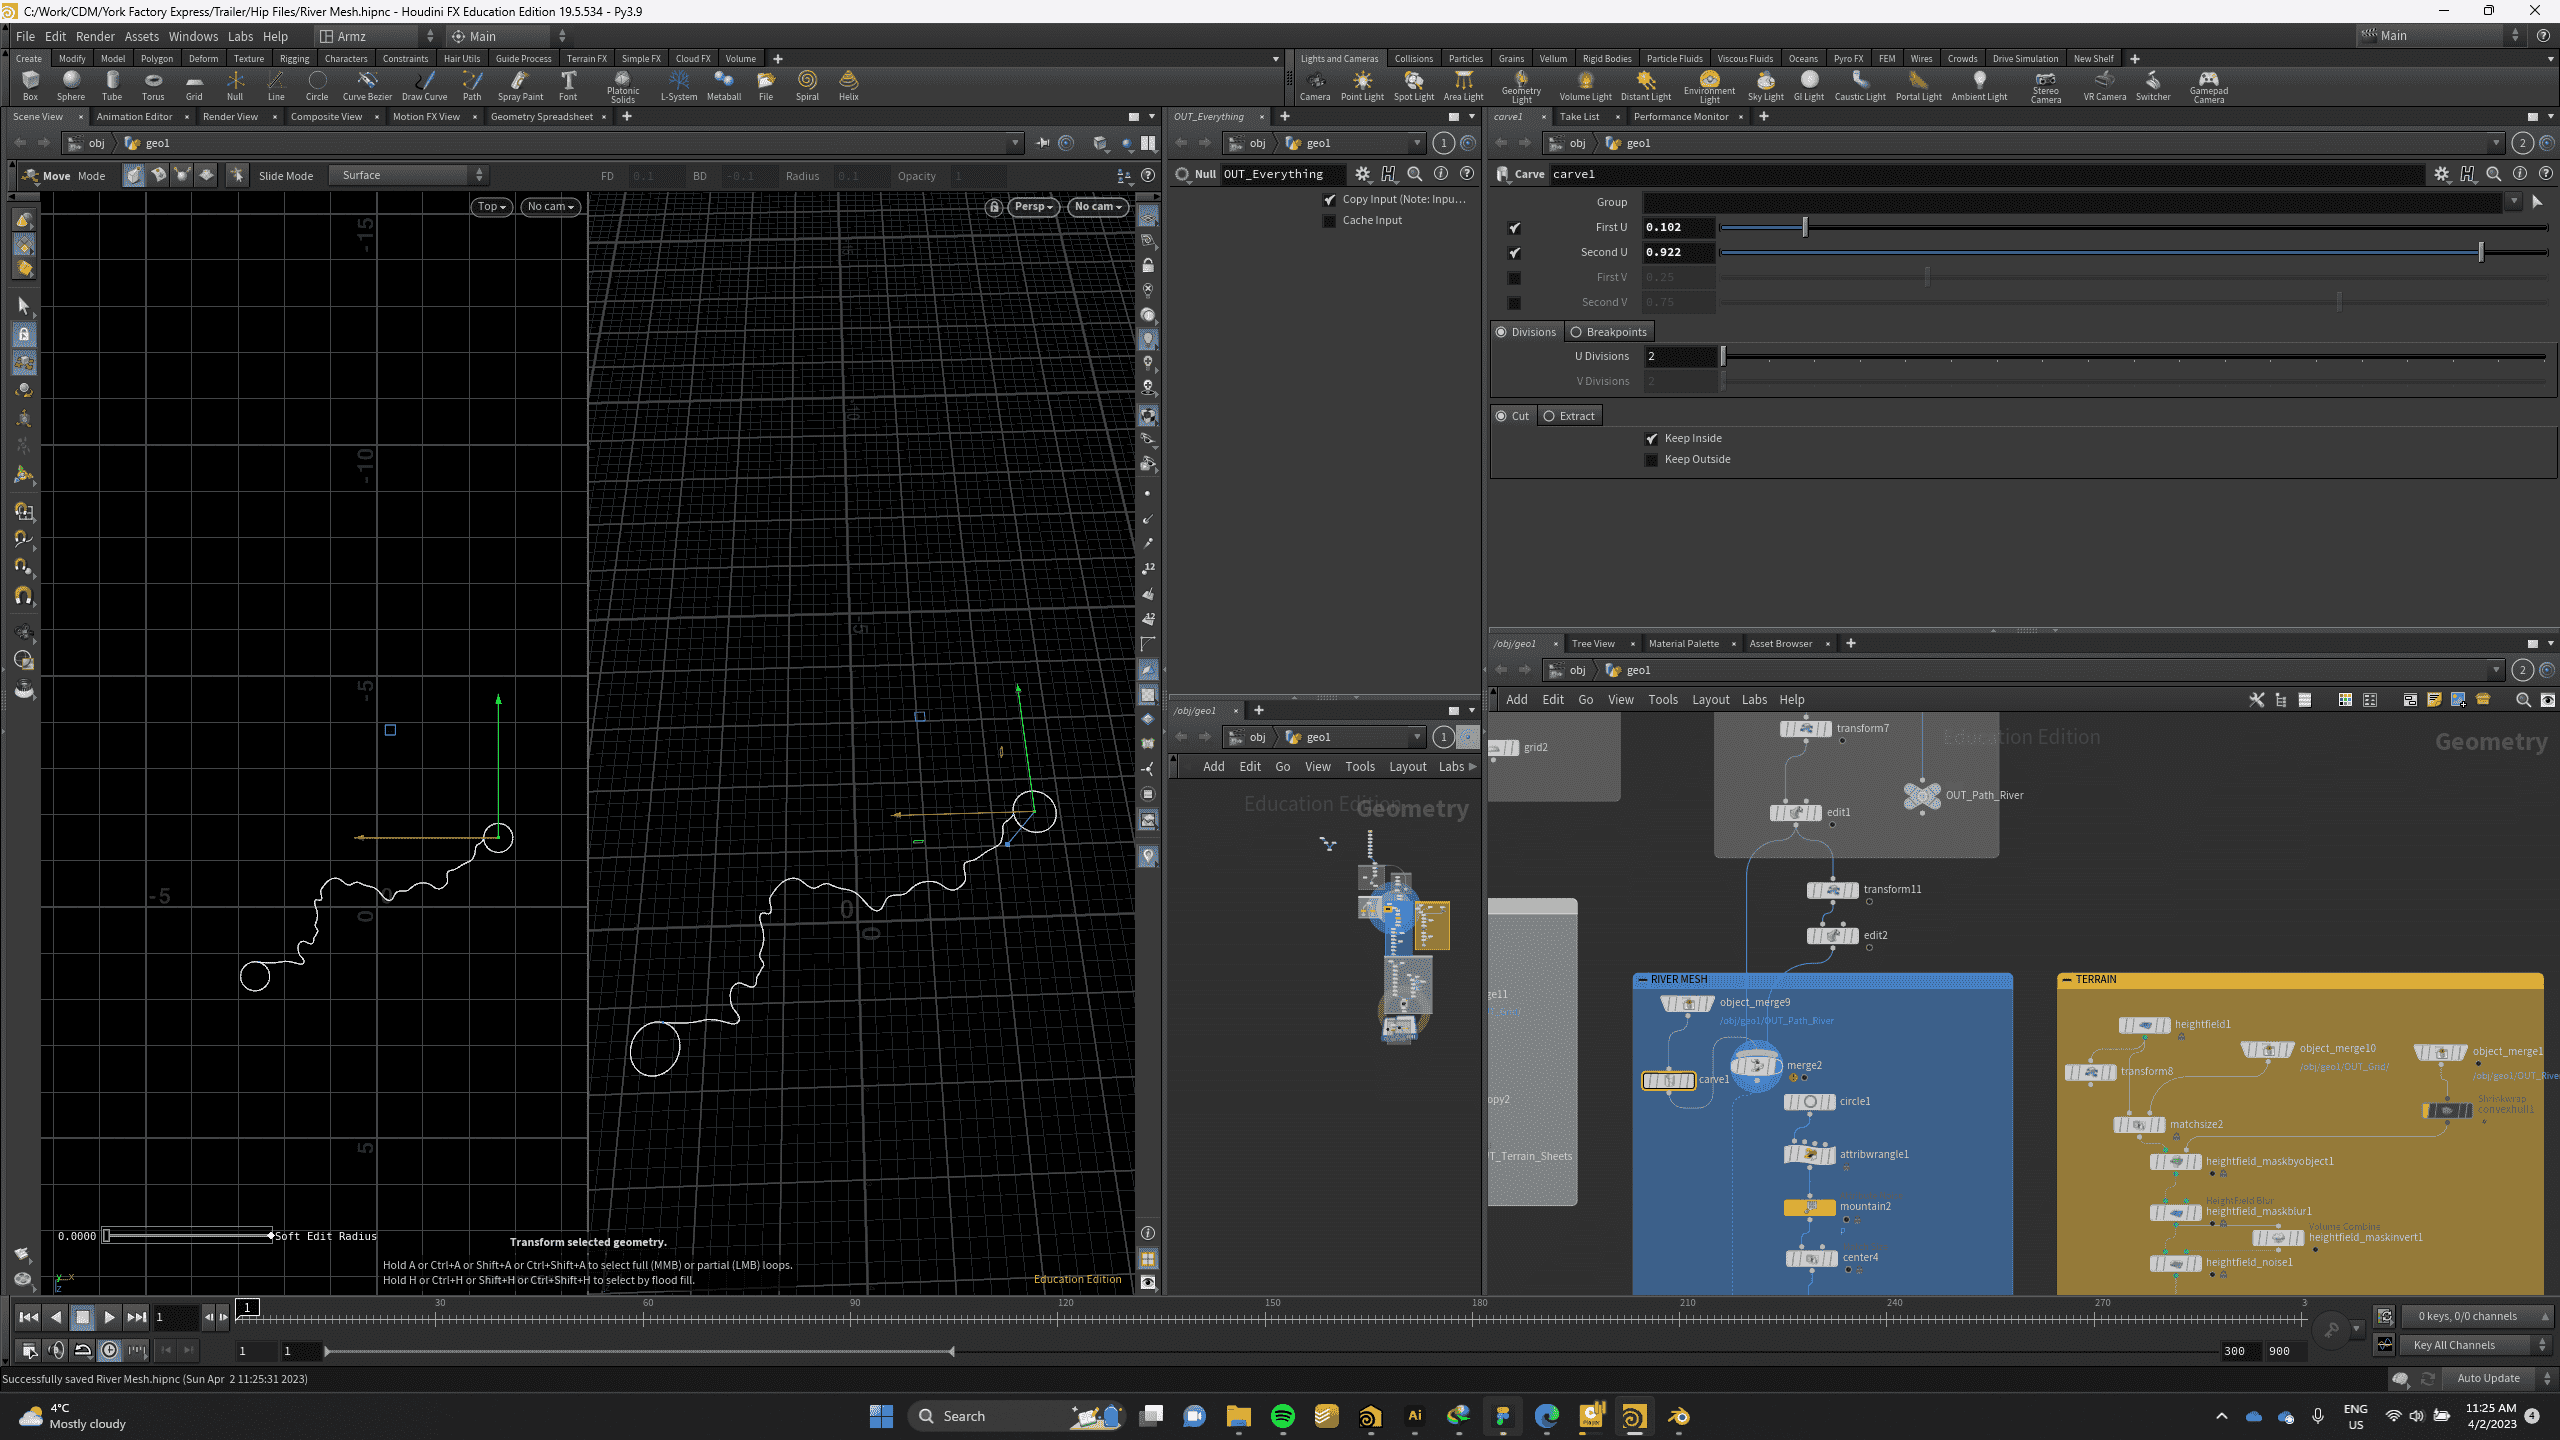
River Path 
Blender Assembly 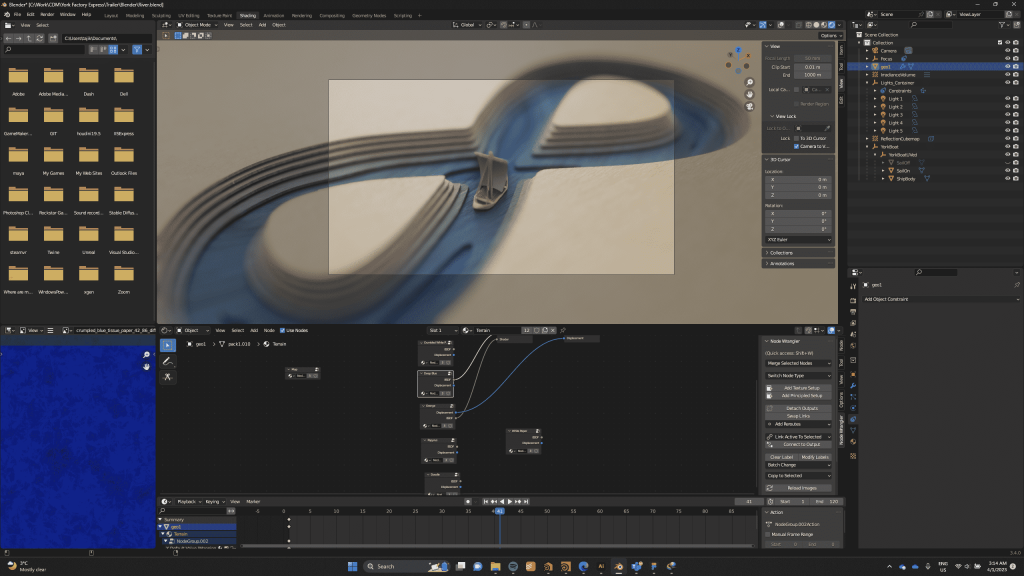
Motion Creation 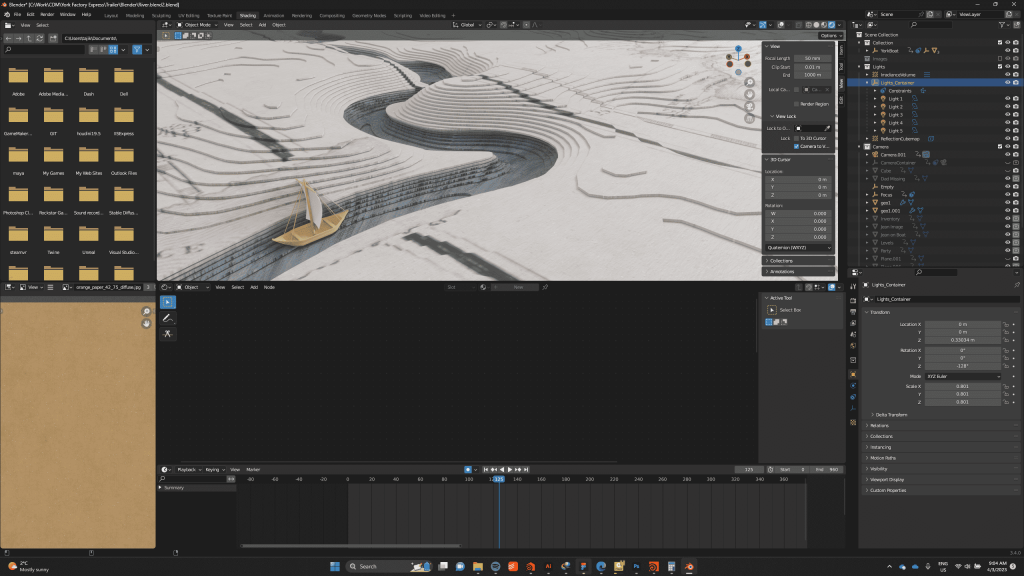
Camera movement adjustment -
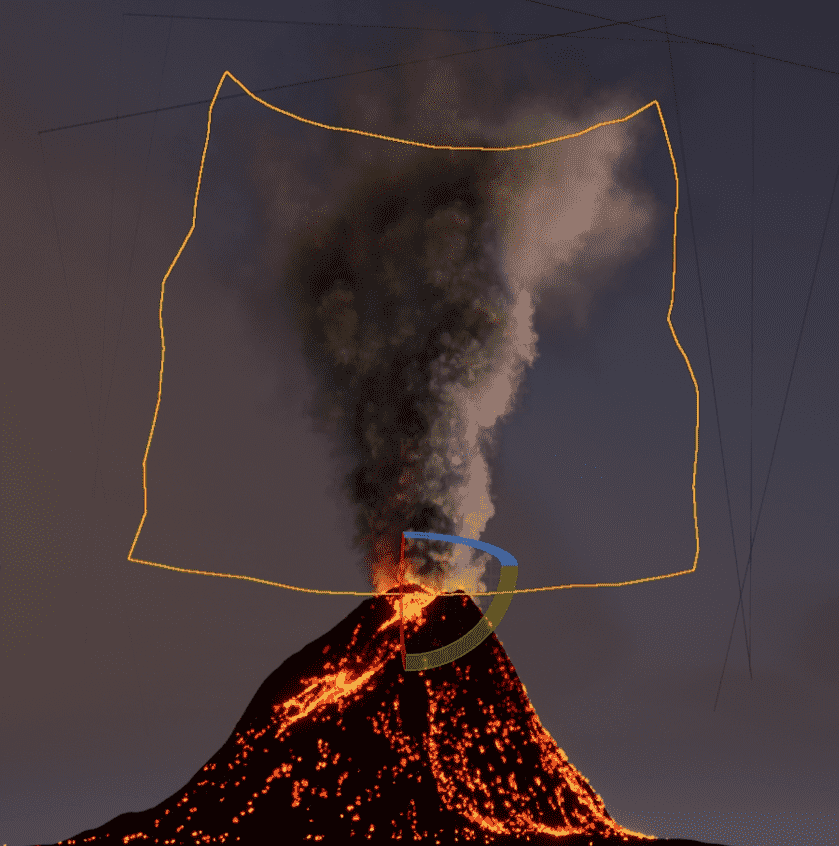
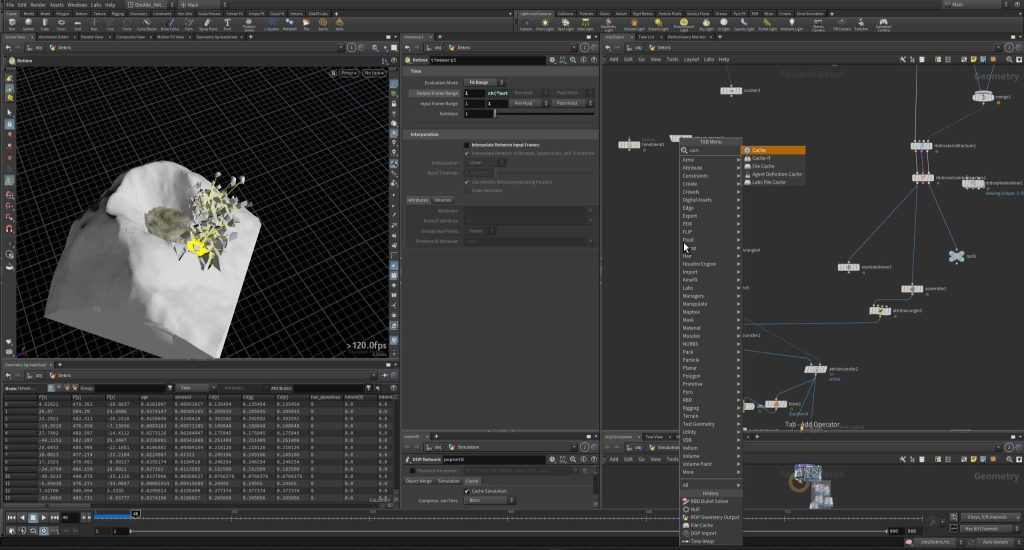
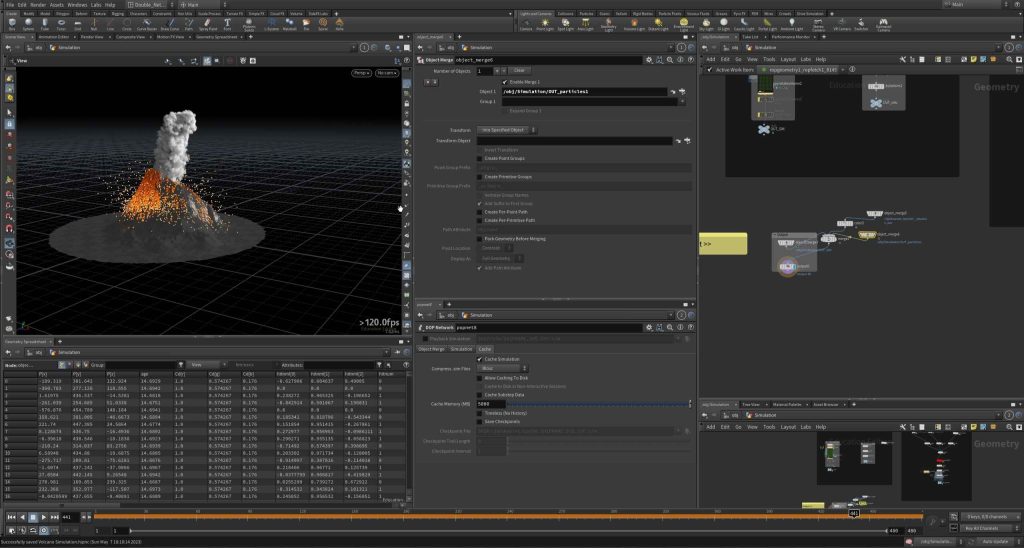
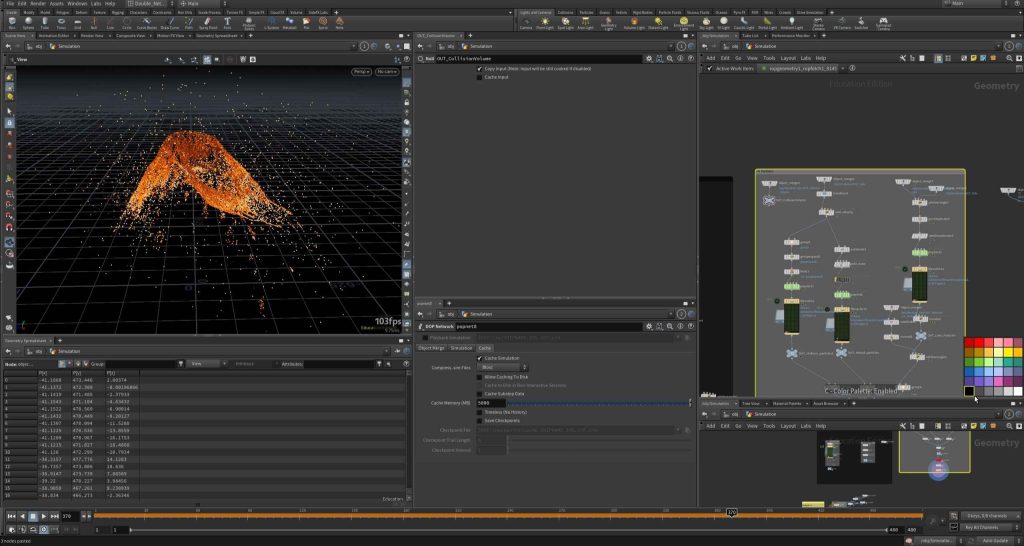
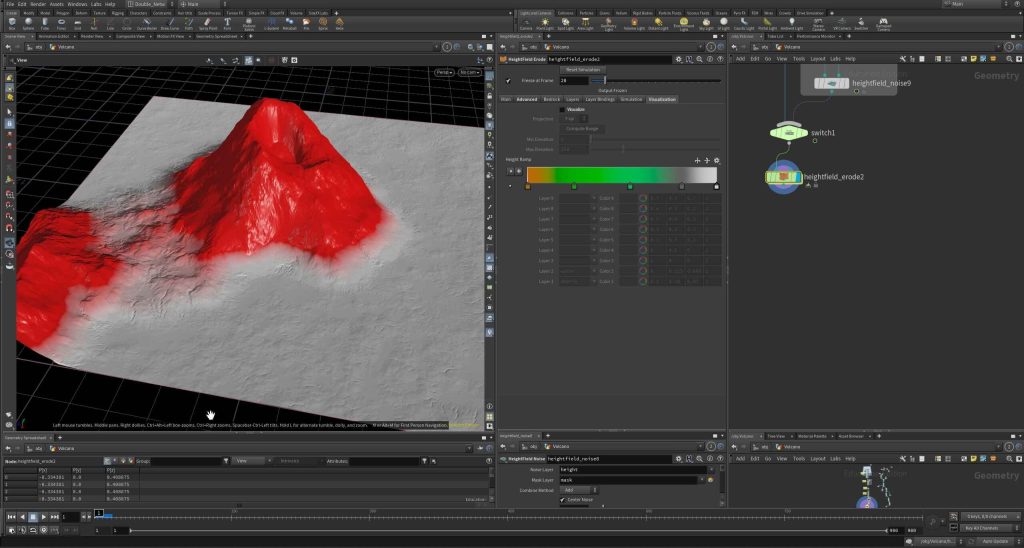
A Cinematic in Unreal Engine Niagara
In this personal project, I used heightmap data from Taal Volcano in Manila as a foundation. I then exaggerated the low-resolution mountains and created a realistic volcano with lava eruption, destruction effects, smoke, and explosions.
-
A procedural solution to a procedural problem
Infinite River is an educational casual video game about the Métis people of Canada and the York Factory Express. I worked on it as a CDM industry project with a team of six people.
The visuals of the game heavily rely on the cliffs and trees that line the river’s banks, making them significant 3D elements. These assets, along with the systems that generated them, underwent multiple iterations during the production phase.
Since the river was procedurally generated using numerous preconstructed tiles, manual asset creation became impractical. The procedural approach also made it impossible to accomplish in a single pass, and the sheer number of possible tiles made individual handling too time-consuming.
Consequently, the initial iterations were entirely based on procedural techniques. The first concept involved extruding a mesh along the splines that defined the shorelines during runtime. However, the transitions between tiles and the unpredictable curves in the river resulted in frequent self-intersections and undesirable visual outcomes.
Initial mesh of the banks (solid green area) During our problem-solving process, we evaluated three potential solutions to address the challenge at hand. The first option involved developing a real-time mesh generator, but we quickly realized that it would be time-consuming and didn’t align with our project timeline. The second approach entailed manually placing river tiles and creating individual river shore assets, such as cliffs and trees, for the entire river. While feasible, this solution would have compromised our procedural system and consumed a significant amount of time. The third alternative was to place shore assets in each tile, but with nearly 40 tiles to work with, this too presented a daunting task.
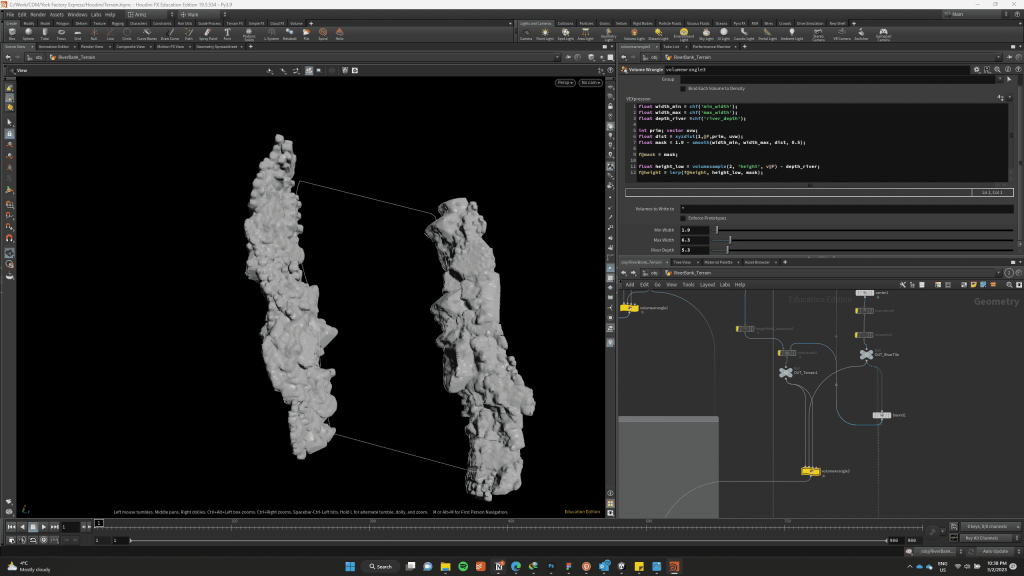
We ultimately chose the third solution but aimed to optimize the process. Instead of manually placing cliffs, I leveraged SideFX Houdini to generate cliffs procedurally, generate basic texture maps, and place trees accordingly. Though the generated cliffs required some texture adjustments and precise placement, this approach proved to be a time-saving method that allowed us to move forward with our intelligent river-generating system.
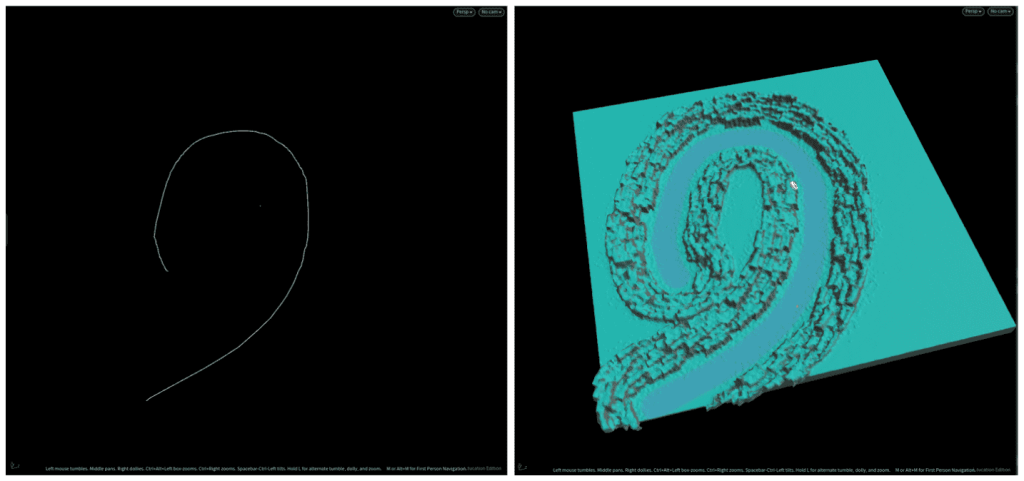
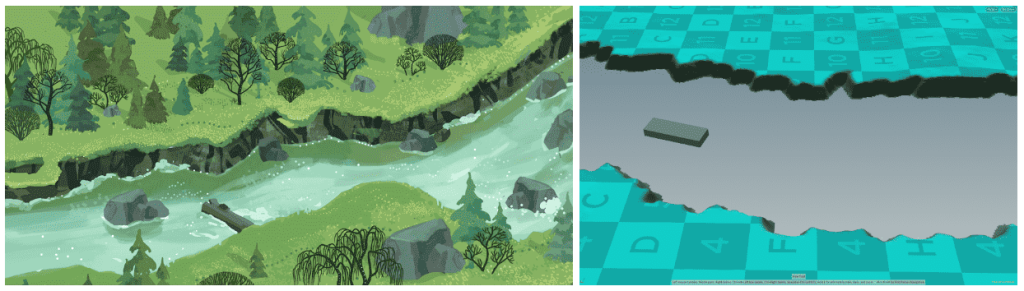
Initially, I designed the tool to use curves, and later adapted it to utilize flow maps as the input. In our game prototype, we generated rivers using flowmap textures, and I used the same flowmap textures to create cliffs along its path. While the results weren’t perfect, we found them acceptable, given the prototype state of the game.
Afterwards, I proceeded to apply UV mapping and baked the grass texture on the geometry, that had the normal vector faced upward. To streamline the process for all the flowmap textures, I utilized a TOP network.
River tile with added mesh Lastly, I used Houdini Unity Engine to effortlessly place the vegetation atop the land. The engine automatically selected the appropriate prefabs and positioned them on the cliffs, making use of the random scattered points calculated in Houdini.
Comparing the concept art and the result (Concept art done by Ziyi Gao) Having successfully generated cliffs along the river path, we proceeded to make further adjustments to the cliff generator. These modifications were aimed at facilitating the creation of river banks for a different camera view.
-
A short interactive VR Experience
Visual Storytelling – Fast Prototype
Role
- Set up VR character movement and interactions
- Optimized assets for VR experience
- Added destruction FX to the mirror using Unreal Chaos system
- Made the mirror’s destruction interactable for VR


